You can find a cheap Chinese soil moisture sensor labeled YL-100. But it’s hard to find working instructions on how to use it. This article intends to fill this gap.
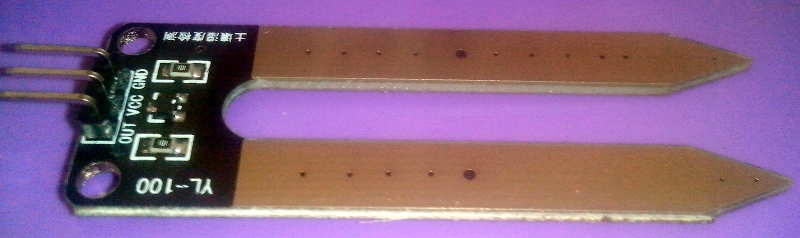
First of all, it should be noted that this YL-100 is an analogue of the SparkFun Soil Moisture Sensor (here it is its source materials, instructions, 3D models). The YL-100 differs from the original SparkFun, probably only in the order of the location of the contacts. Usually the YL-100 sensor is sold with the following description: “3Pin Soil Hygrometer Detection Module Moisture Sensor Analog Output Arduino”.

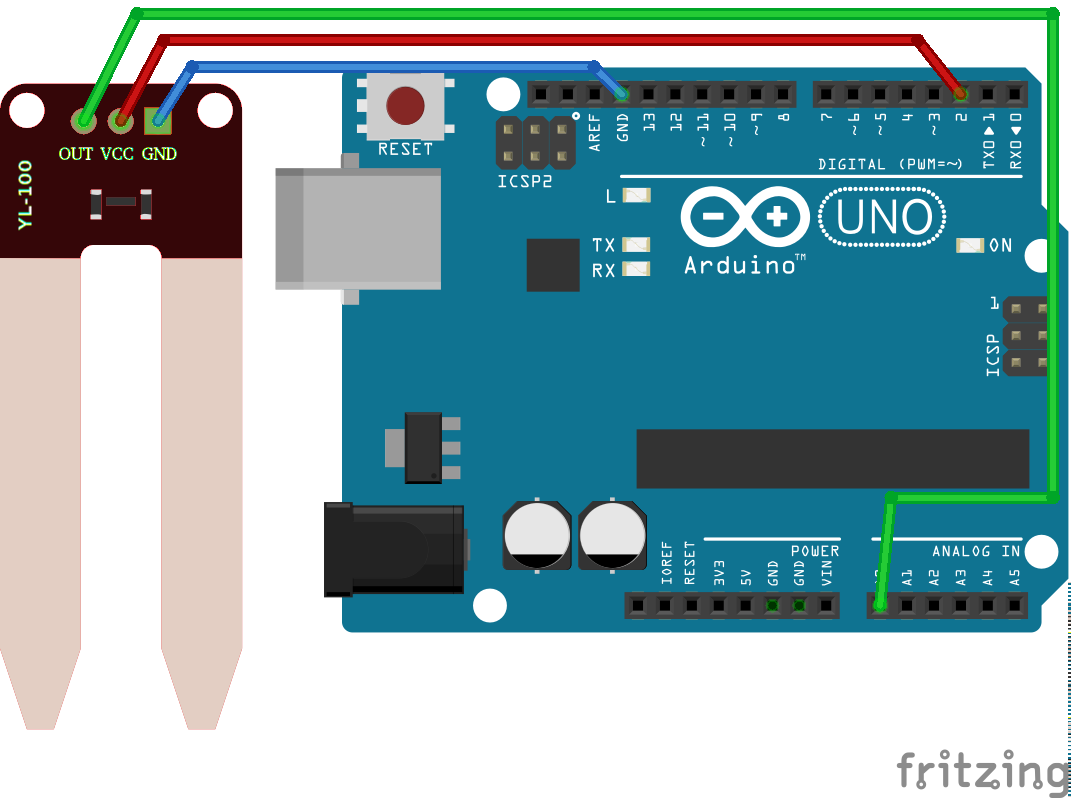
The sensor requires a voltage on the VCC and GND terminals. The value from the OUT terminal will depend on the power supply voltage (3.3 to 5 volts is recommended). Below, the connection diagram and sketch for Arduino will be described, when the voltage to the sensor will be applied for 10 milliseconds, only at the moment of receiving the readings-such a scheme will protect the probe from premature oxidation. With a constant supply of power to the sensor – the probe will quickly become corroded.
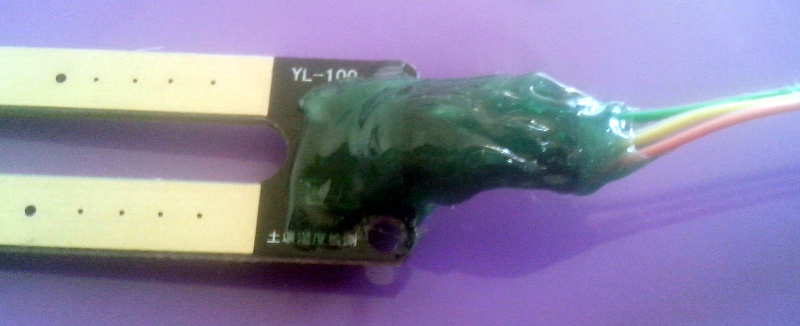
It is also strongly recommended after connecting the contacts to the sensor – it is good to damp-proof the electronic part and the switching point, when working in constant dampness this will prolong the life of the device:
This is the scheme of connection YL-100 sensor to the Arduino Uno with power supply on demand:
And this is the appropriate sketch for Arduino IDE, connecting any third-party libraries is not required:
/*

*  YL-100 sensor Example

*  Based on "Soil Mositure Basic Example" by SparkFun Electronics, Joel Bartlett

*  Released under the MIT License(http://opensource.org/licenses/MIT)

*/

int mositure = 0; // Value to store the humidity value

int YL100OUT = A0; // Variable for the number of the analog pin to which the sensor is connected

int YL100VCC = 2; // Variable for pin number for sensor power supply

void setup()

{

Serial.begin(9600); // Open the serial bus via USB

pinMode(YL100VCC, OUTPUT); // Set the power pin to the output

digitalWrite(YL100VCC, LOW); // Set the power level to LOW after power on

}

void loop()

{

Serial.print("Soil moisture = "); // Print the output line prefix

Serial.println(readYL100()); // Get the moisture value from the function and print it

delay(5000); // Delay in 5 seconds before the next data retrieval

}

int readYL100() // Function of reading data from the sensor

{

digitalWrite(YL100VCC, HIGH); // Turn on the sensor power

delay(10); // Delay of 10 milliseconds

mositure = analogRead(YL100OUT); // Read the value from the sensor pin OUT

digitalWrite(YL100VCC, LOW); // Turn off the power

return mositure; // Return the read value

}
In the Arduino IDE, you can check the performance of the sensor immediately after it is downloaded through the built-in Serial Monitor.
The sensor readings will depend primarily on the applied voltage, as well as on the type of soil and the oxidation level of the contacts.
A value of ‘0’ means that the sensor is not in the soil, the commutation is broken or the soil has reached an absolute dryness (which is unlikely). With a voltage of 5 volts, the maximum value of the sensor can be about 800 (when immersed in water), at 3.3 volts – already about 500.
That is, each individual sensor installation requires calibration. If it is necessary to standardize the output values (for example, to bring them to the usual kind of humidity percentages), you can use the built-in map() function.
what a great part. wherre can i get that?
https://www.ebay.com/itm/3-Pin-Soil-Hygrometer-Detection-Module-Moisture-Sensor-Analog-Output-For-Arduino/272686886739
https://ru.aliexpress.com/item/3Pin-YL-100/32847141328.html
Just for long continuous using this sensor fits poorly. It oxidizes rapidly.
good information, thank you 🙂
what is the function of that tool?
Is the device safe ? without package?
Function – measurement of soil moisture. The device is safe. Without package.